Pages

Showing posts with label smokey eyes. Show all posts

Friday, March 15, 2013

My two favorite products! Plus a lighter smokey/defined crease look :)


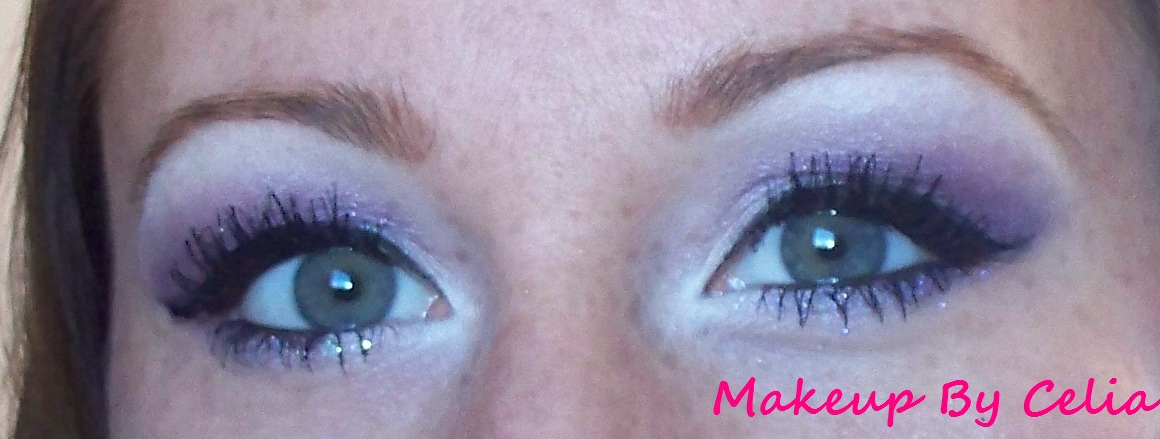
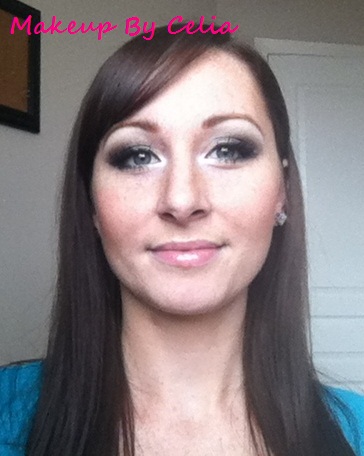
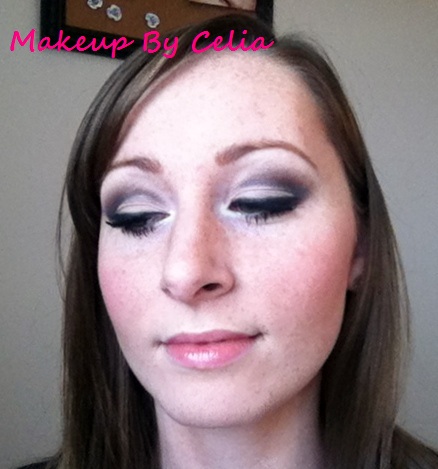
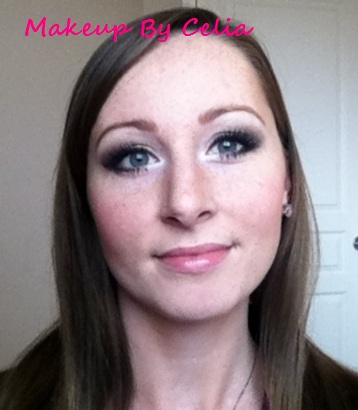
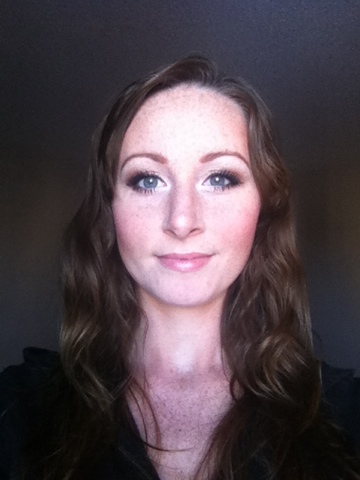
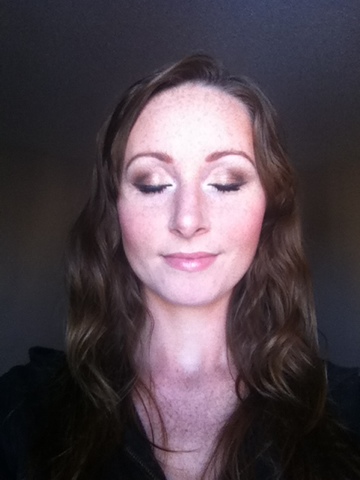
 Here is another lighter smokey look with two new products I'll never go without! In these pics of my makeup I used both and makeup stayed allll day.

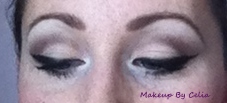
The Garnier Skin Renew B.B. Cream is amazing! I've been using it for a few months now and it's the best skin primer/moisturizer. I love it because it evens out skin tone so well and you dont need to wear much foundation with it. I just use this with a loose powder on top to keep my skin matte and to make my skin look more even. Even if you dont use foundation I think this would be great just as a morning moisturizer. Picture below.


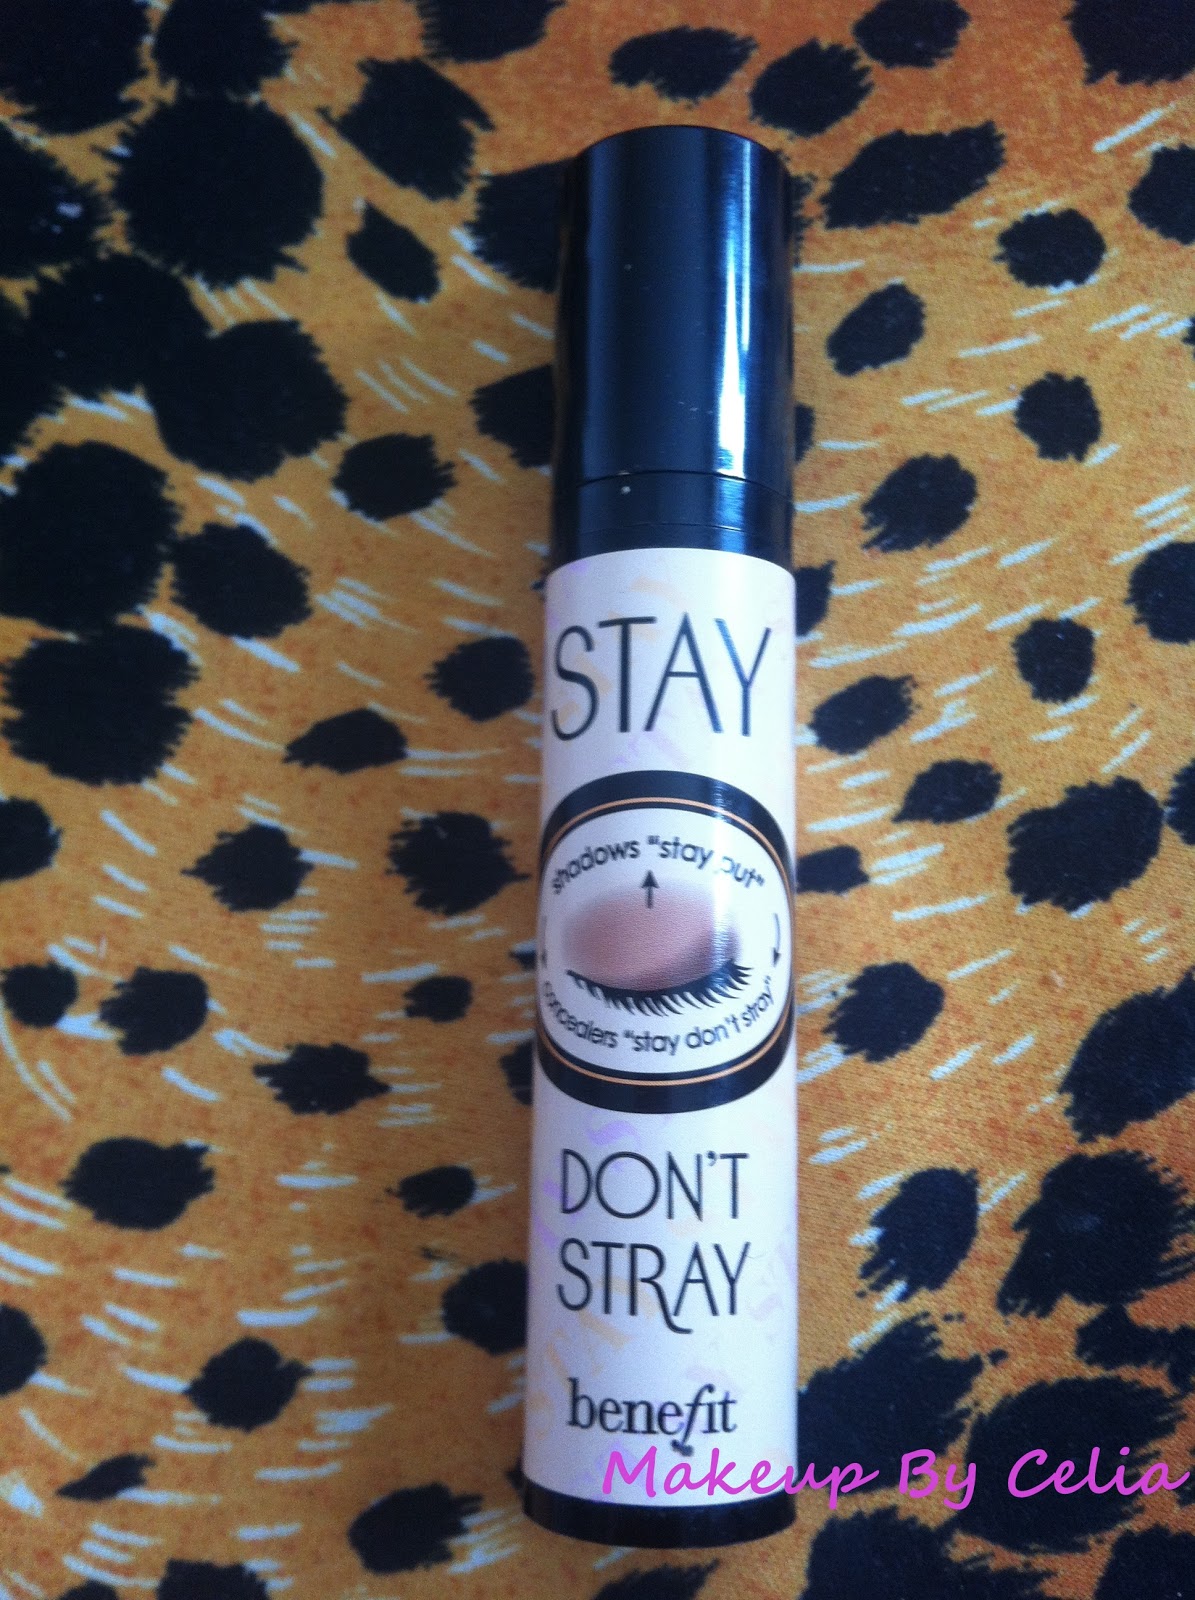
Stay Dont Stray by Benefit is wonderful too! I just got this one about a week ago and I am so impressed with it. It is an eye primer that also works great as an under eye concealer. I have used a lot of other eye primers and this one is my favorite because of how well it makes your eye makeup really stay and how the color of it doesnt interfere with with your eyeshadows and change their color(I've had some primers that did that in the past). I also love how great of an under eye concealer it is! Just make sure to blend it out well and put powder on top. Picture below.

 P.S. Sorry about the messy hair in the pics, it just wasn't working out!

Hope everyone will try these out and love them! :D

Tuesday, March 12, 2013

Step by step smokey/defined crease eye makeup


Here are a few pictures to show some steps for doing a light defined crease/smokey eye.

1) In the first picture I already have the medium shade on the inner three quarters of the eye just up to the crease and a thin line of the medium shade under the eye on the inner half. Next I put the dark shade on the outer corner and blended into the crease and also put a thin line of it under the eye on outer corner. After that I used a white eyeliner pencil to brighten the inner corner and used a good blending brush to put light shadow over the white liner to blend it more and under brow to brighten the eye.
2)I used a creme liner and made sure not to let it go too far down because that can make the eye look like its sagging. It is good to make sure the line is thin on the inner corner and gradually make it thicker on the outer corner to give more of a cat eye look.
3) With a small angle brush I put some black liner on top of the gel liner and just on the edge of it to set the liner well so it wont budge and to give it a little bit of a smokier look.
4) Before I put mascara on I ALWAYS curl my lashes! To give my lashes the most volume I also always use more than one mascara. I like to use one that is good for growing my lashes first, then a good one for thickening and lengthening, and then one that separates the lashes well and is also waterproof so the mascara will stay on better. If I go swimming I will use all waterproof but if not swimming its better to only use waterproof mascara as a top coat because it can really dry out lashes and be very difficult to take off.
5) This picture is the final look, not too dramatic but really makes my eyes look a lot more noticable. Also, I had brow pencil on already for the first picture but I put a brow powder on after and brushed it out to help set the brows and make sure it'll stay on all day.
6) Here is the eye makeup I used:
    Medium: Rimmel Stars-159 Frivolity
    Dark: Merle Norman Luxiva Lasting Eyecolor-Bordeaux
    Highlight: NYC City Duet Eyeshadow-White
    Liner: Loreal Infalible Laquer Liner 24hr-171 Blackest Black + the black shadow from the NYC City Duet eyeshadow on top
    Mascara: First coat~Revlon Grow Luscious plumping-Black, second coat~Covergirl Clump Crusher-very black, third coat~Covergirl lashblast 24hr-very black
    Brows: Rimmel brow pencil-002 Hazel + Essence eyebrow stylist set-dark brown

Wednesday, December 12, 2012

Bright smoky purple eye makeup *with sparkles


 Here's a really fun look! I wish my camera showed sparkles better though!
There isn't a lot of sparkles and it doesn't need to be added but it's a fun extra for going out! There is just a thin line of sparkles under the eye, it makes the eye sparkle when the light hits it and can look pretty for going out. :D

First, like always, I put a thin layer of eye primer all over lid and a thin line under the eye. Primer helps SO much! It helps eye shadow to show up way more and also helps it to stay in place all day/night! Next I put the medium shade on inner 3/4 of eye lid, just up into the crease a bit and a thin line under eye on the inner 3/4 as well. Then I blended the dark shade on outer corner, into crease and a small bit under eye on outer corner. I made sure the lines were blended because if you see sharp lines where different shadows meet it will look unfinished. To help that even more, I blended the medium shade shimmer, that matches, on top of other medium shade and blended the lines of the dark shade better. Also I blended a bit of the shimmer under the eye . After all the shadow is done I put on my gel liner with black shadow to set it and help it look smokier. Then I put on LOTS of mascara and eyes are done. :) Or if you want to make the look more fun you can always add sparkles!!
To add sparkles to this look I just used a clear gel sparkle eye liner and put a thin line under lashes, under the eye, and then put some loose sparkles or sparkle dust on top to set it, make it stay in place and make even more sparkly!  After, I had to put a bit more mascara on bottom lashes so they could be visible through sparkles, not just covered in them ;p hehe.


Friday, July 27, 2012

Step by step smokey golden eyes with Motives

Here is my step by step guide to smokey golden eyes with Motives cosmetics :)


1) It's always best to start with a thin layer of eyeshadow primer all over the lid from lash line to eyebrow and a thin line under lower lash line. Next I put the medium shade, Motives eyeshadow in Pink gold, up into the crease a little higher to make the eyes appear larger. Also put a thin line under the eye from just inside inner corner to just inside outer corner (other shadows will fill in the inner and outer corner).

2) I put the dark shade, Motives eyeshadow in Hazelnut, a bit above the crease to keep the eye looking larger.

3) To make sure the eyes don’t look droopy, never let the shadow go past the line you see in picture 3. In the picture I have the brush past the line just so you can see the line better. Place a brush on side of nose and up to outer corner of eye, just a little past outer corner so you can connect a thin line of the dark shadow on bottom outer corner to the outer corner of crease. If needed, blend a bit more of the medium shade to where the dark shade starts under the eye.

4) With a blender brush put the highlight, Motives eyeshadow in Creme fresh, under the eyebrow and make sure it is blended well with the dark shadow. If it looks too harsh of a line and doesn't look blended well enough you can blend a bit of the medium shade where the highlight and dark meet, to make it look smoother and add a tiny bit more color. For this look I blended a lighter gold, Motives eyeshadow in Whipped cream, between highlight and dark. Also I used the lighter gold to blend the highlight on inner corner with the medium.

5) For the eyeliner, Motives Gel liner in Onyx, I used an angled liner brush to make a thin line from inner corner to just past pupil and then gradually make line thicker and slanted up. Where the shadow ends is a good guide to where the liner should slant up and end. Next, with a small angled shadow brush, put black shadow on and just on edge of gel liner to set it in place so it wont budge all day and to give it a smokier look. Also to make the look a little darker I blended a bit of that black shadow with the angle brush under outer corner. If you wanted to make it more dramatic you could also put a waterproof liner in waterline of eye, upper and lower. After liner I curl my lashes and put on lots of mascara, top and bottom! To make eyes even bigger I usually put fake lashes on outer third of eye, this makes the outer corner look more lifted and gives a cat eye effect. Didn’t put any on this time but usually do!

6) For the rest of the look I made sure to keep all of my makeup in warmer tones so that nothing will clash. It's always best to keep all of your makeup in the same color tones, if you mix warm and cool together it can make your makeup look way over done and not fitting together. Sometimes fun looks can be made with mixing colors but usually just for crazy night looks. :)


List of makeup used:

Eyes:
  • Medium shadow -Motives Pink gold + Motives Whipped cream
  • Highlight shadow -Motives Creme fresh + Motives Whipped cream
  • Dark shadow -Motives Hazelnut
  • Liner -Motives Gel liner Onyx + Motives Onyx shadow
  • Mascara -Motives mascara plus a couple other types (I layer a couple different mascaras most of the time) 
Face:
  • Primer -Motives Perfecting face primer
  •  Foundation -Motives Dual Perfection pressed powder -Neutral
  • Bronzer -Motives Miami glow bronze
  • Blush -Motives So Peachy


Thanks for coming to my page and checking out my posts! Please tell your friends and come back more to see lots of new posts coming up! :D 


Monday, July 23, 2012

New Motives Makeup Look!

Finally a new look! Sorry it has taken so long, I will be making new posts a lot more often now! :)


I'm so excited, a friend showed me Motives cosmetics, I've been trying it all out and I love it! I've tried out so many different makeup companies and wow, I can't believe how amazing Motives is. The makeup goes on so much better, stays so much better and feels so much better! Usually I have a couple favorites from different brands but now I'm pretty sure almost all my favorites are Motives! I'm very impressed with how great Motives is so I wanted to share some great new looks with all of my followers! If you aren't a follower yet, please follow :D
  
This smokey purple look is great for making green eyes really stand out but any other eye colour can still rock this look! ;)


 For the eyes I started out with the Motives eye shadow primer all over the eyelid and a thin line under the eye. A good eye shadow primer will make sure it will stay in place all day without creasing or fading away and it will make the colour show up much better.


 Here are the Motives products used on the eyes:
 • Medium shadow - Pink diamond
• Dark shadow - Sweet plum
• Highlight shadow - Creme fresh. (White liner on inner corner first)
• Motives gel liner - Little black dress, with Onyx shadow on liner to set it and on edge of liner to soften the line and make it look smoother.
• Motives Lustrafy high definition mascara - Onyx (Lots of mascara!)

Here are the rest of the Motives products used:
• Foundation - Dual Perfection pressed powder - Neutral
• Bronzer - Miami glow bronze
• Blush - Shooting star


The only product I used that wasn't Motives is Garnier skin renew B.B. cream in Light/medium. I have recently started using this cream as a primer and I love it! I put a thin layer on all over my face and neck before I put any of my makeup on. It helps so much to even out my skin tone and make my skin kinda glow, but not fake looking.
 I really hope everyone loves this look and I hope you'll all try it out :)


Tuesday, January 10, 2012

Gold, copper smokey eye makeup

Here is a look that isn't too dramatic but also not boring :)
For the eyes:
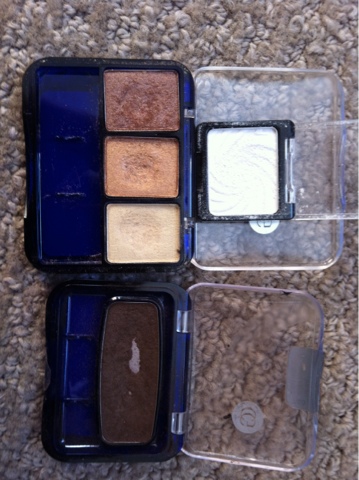
First I used an eye shadow primer so the shadow will show up better and stay in place way longer. Next I used the light gold from the CG trio on the inner third of the eye on top and bottom, the medium copper blending with the gold and in the middle of the eye on top and bottom, and the darkest shade in that trio on the outer corner top and bottom and blended into the crease. If you would like to make it a little more dramatic or darker it is good to blend a bit of darker brown or black on the outer corner and crease as well. After the shadow I used a white eye liner on the inner corner and put a very light shadow over top to blend it and also blended that shadow under my brow and made sure that it blended with the darker shadow. Next i put black cream liner on top lid along lash line and put black shadow along the edge of it to make it look smokier and to help it set better. After that you just need to curl lashes and put mascara on and eyes are done.
For the face:
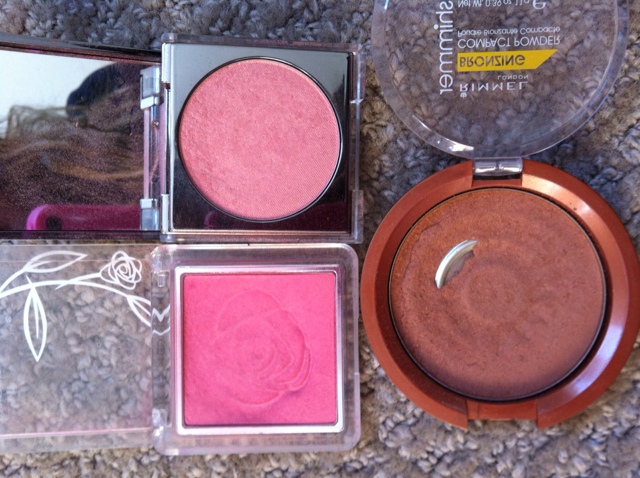
The face is quick and simple, the eyes are pretty easy but the face is even quicker! All I did was put on my face powder, bronzer, and blush.

Here is the makeup I used:
•Eyeshadow base- Wet n Wild-ESB02 pearl
•Trio set- CoverGirl eye enhancers-115 Gold sunset
•Dark brown- CoverGirl-Brown smolder
•Highlight- Wet n Wild-Sugar
•Cream liner- Maybelline eyestudio-blackest black
•Mascara- LancĂ´me-Hypnose + Revlon-Grow luscious waterproof blackest black
•Brows-1st- Rimmel brow pencil-02 Hazel, 2nd- Ardell brow powder-Mink brown. Then use brow brush to smooth out and look more natural. I find that using both helps it to stay in place much better.

Face makeup:
•The Body Shop- All in one pressed powder 05
•Rimmel- sun shimmer bronzing powder-medium shimmer
•The Body Shop- roseflower blush 02
•Lise Watier- Libertine blush

Tuesday, April 19, 2011

Smokey gold eye makeup video


The makeup I used for eyes:


NYX -Eyeshadow base, pearl esb02
Wet and Wild -Vanity 249 set (medium and both dark shades)
Prestige -eyeliner, white (inner corner)
Covergirl -Snow blossom (inner corner)
Covergirl -Shimmering onyx (to shade edge of liner)
Maybelline -Eyestudio creme liner, blackest black (top liner)
Annabelle -Smoothliner waterproof, black (bottom and inner rim liner)
Revlon -grow luscious mascara, blackest black

For face:

Merle norman -luxiva purely mineral loose powder foundation L60
NYC -Sun 2 sun bronzing powder, terracotta tan
The Body Shop -roseflower blush 02

Wednesday, January 26, 2011

Purple smokey eyes -Wet n Wild kit -lust


In this look I used all cool tones to make sure everything blends together nicely. 
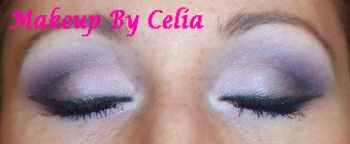
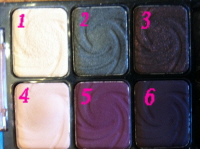
On my eyes I started with an eyeshadow base to make sure it will stay in place all day and to make the colours show up more too. Next I put the medium shade(4) on the inner three quarters of my eyelid, just up to and a little into the crease. Also put the medium(4) on the inner three quarters under the eye. For this look there are 2 dark shades I used, first I put the lighter one(5) on the outer corner and in the crease the put the colour in there and then I put the darker one(3) mainly on the outer corner to make it darker. Always remember to make sure to blend everything very well because it really doesnt turn out as well when you can see all the lines exactly. I also like to put a bit of liner just under the lash line on the bottom lashes and blend the dark shadows into that and the medium to make it all soft and smokey. If it looks too dark or goes too far in you can always wipe a little off and/or blend the medium into that again. Same goes for the top, if the dark gets too far on to the medium then just blend it away with more medium. Next you'll want to do your eye liner a little thicker on the outer corner and slanting up a bit and its good to take a small angle brush and put a small bit of black on the edge of your liner to make it look a little softer, dont make it any thicker on the inside though, you always want that to be a very thin line. Next you'll want to blend the highlight(1) under your brow and on the inner corner of your eye. Last step for your eyes is mascara and its always best to curl your lashes first and use a mascara that helps to make lashes thicker and longer.

Here is what I used:
Eyes:
Base-NYX~eyeshadow base pearl
Wet n wild set~lust c248...
Medium-4 (light pink)
Lighter dark-5 (purple)
Darker-3 (deep purple)
Highlight-1 (very light pink, almost white but not too white)
Liner-Maybelline~eyestudio creme liner with Covergirl~shimmering onyx shadow on the edge with small angle brush
Mascara: Revlon~Grow luscious (its my fav right now in waterproof and has been for a while) 

Lips: Light plum lip liner lining a bit outside my lips to make them look bigger and filling in my lips a little too so it doesnt look fake and then a light plum gloss on top and a bit of shimmer put just in the middle of my bottom lip to make it look even bigger.


LinkWithin

Related Posts Plugin for WordPress, Blogger...